
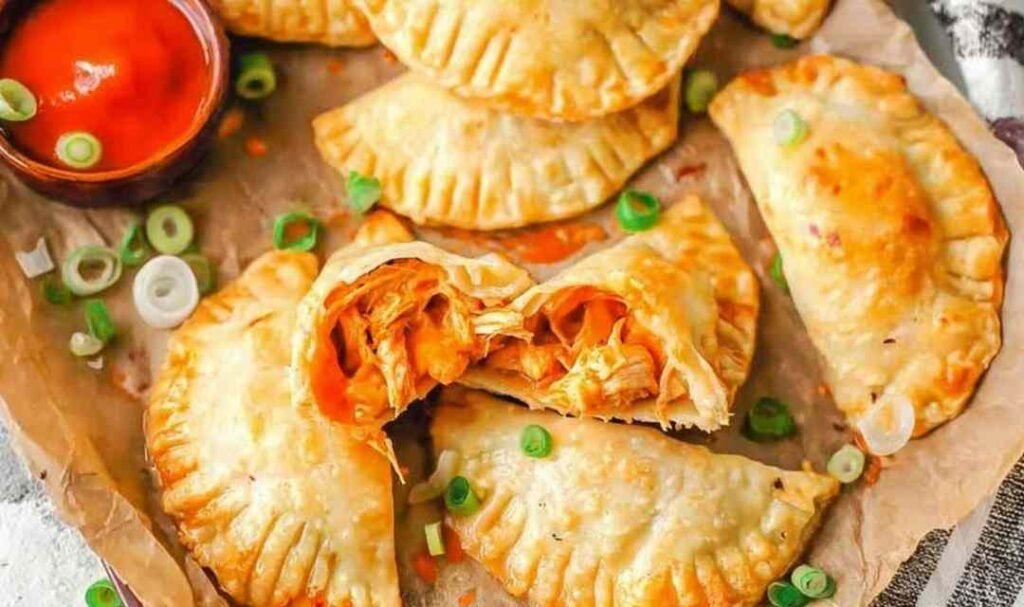
Chicken empanadas are golden, crispy pockets stuffed with savory shredded chicken filling, and once you make them at home, you will never want store-bought again. I started making these on busy weeknights when I needed something hands-on but totally worth it. These baked chicken empanadas hit every note: crispy shell, juicy filling, and so much flavor in every bite. Your family will thank you!
I still remember the first time I made a big batch of these on a Sunday afternoon. The kitchen smelled incredible, and my kids kept sneaking them off the baking sheet before dinner even started. What makes this recipe special is how the seasoned chicken filling comes together with just a handful of pantry staples. The baked method keeps things lighter without sacrificing that satisfying crunch. If you love handheld chicken recipes, you might also enjoy these Shredded Chicken Tacos on a busy weeknight. Make this tonight!
Table of Contents
Ingredients for Chicken Empanadas
I have tested this recipe more times than I can count, and these are the exact ingredients I reach for every single time. The quality of your shredded chicken and spices makes all the difference here.
- 2 tablespoons neutral oil (vegetable or canola oil)
- 1/2 yellow onion (diced) — I always dice it small so it melts right into the filling
- 2 bell peppers, any color (diced) — my preference is one red and one green for color and sweetness. If you love that bold pepper-and-cumin combo, these Sheet Pan Chicken Fajitas use the same flavor profile
- 4 cloves garlic (minced)
- 2 tablespoons tomato paste — pro tip: look for tomato paste in a tube so you can use just what you need and keep the rest fresh
- 2 teaspoons ground cumin
- 1 teaspoon dried oregano
- 1/2 teaspoon kosher salt
- 1/4 teaspoon ground black pepper
- 2 cups shredded cooked chicken — I recommend using rotisserie chicken here for the best flavor and texture. You can also bake your own with this Easy Oven Baked Chicken Breast recipe and shred it yourself
- 1 cup water
- 10 frozen empanada dough rounds, thawed (such as Goya) — in my experience, Goya rounds thaw perfectly in the fridge overnight
- 1 large egg (lightly beaten, for egg wash)
Step-by-Step Instructions
I recommend reading through all the steps before you start. It makes the whole process feel smooth and stress-free. These chicken empanadas come together easier than you think, and the results are well worth it.
Step 1: Heat the oil in a large skillet over medium heat. Once shimmering, add the diced onion and bell peppers. Cook, stirring occasionally, until they soften and turn slightly golden, about 5 to 7 minutes. Add the minced garlic and stir for 30 to 60 seconds until fragrant.
Step 2: Stir in the tomato paste, cumin, oregano, salt, and pepper. Keep stirring for about 2 minutes until the tomato paste darkens slightly and the spices smell toasty. Do not rush this step. That extra minute of cooking deepens the flavor of the whole filling.
Step 3: Add the shredded chicken and water. Stir everything together and let it simmer until most of the liquid is absorbed and the chicken is juicy and well-coated, about 5 to 8 minutes. Remove from heat and let the filling cool completely. For best results, chill it in the fridge for at least 30 minutes before assembling. Warm filling makes the dough harder to seal.
Step 4: Preheat your oven to 400 degrees F. Line a baking sheet with parchment paper. Lay out your thawed dough rounds on a clean work surface. Spoon about 2 tablespoons of filling onto the center of each round. Do not overfill or they will be hard to seal and may burst open during baking.
Step 5: Lightly moisten the edges of each dough round with water using your fingertip. Fold one half over the filling to form a half-moon shape. Press the edges firmly together first with your fingers, then crimp all the way around with a fork to fully seal. A good seal prevents leaks in the oven.
Step 6: Place each sealed empanada on the prepared baking sheet. Brush the tops generously with the beaten egg. Bake for 25 to 30 minutes, until deep golden brown and crisp. Let them cool for a few minutes before serving. The filling holds a lot of heat inside.
What to Serve with Chicken Empanadas
The right sides turn these into a full, satisfying meal. I like to balance the rich, savory filling with fresh and light accompaniments that brighten every bite.
Classic Guacamole: The creamy, cool texture of guacamole is the perfect contrast to the crispy empanada shell. It adds healthy fats and a fresh flavor that rounds out the whole plate.
Simple Green Salad: A lightly dressed salad with crisp lettuce, cucumbers, and a citrus vinaigrette cuts through the richness of the filling and keeps the meal feeling balanced.
Mexican Rice: Fluffy, tomato-seasoned rice is a hearty and satisfying pairing. These Best Chicken Enchiladas are another Latin-inspired dish that pairs beautifully with the same sides.
Pico de Gallo: Fresh tomato, onion, cilantro, and lime bring brightness and acidity that complement the warm cumin-spiced chicken filling beautifully.
Did you enjoy this recipe?
Save it to your Pinterest board and make it again later!
📌 Save this Recipe@dinnerchickenrecipes
Chicken Quesadilla: If you are feeding a bigger group and want to round out the spread, these Chicken Quesadillas make a great companion dish with the same bold Latin flavors.
Easy Chicken Fried Rice: For a heartier meal, serve alongside this Easy Chicken Fried Rice for a filling combination the whole family will love.
Sour Cream or Greek Yogurt Dip: A cool, tangy dip is a crowd-pleaser, especially for kids. It balances the spiced filling and adds a creamy element to each bite.

Storage and Serving Tips
Leftover chicken empanadas store well in an airtight container in the refrigerator for up to 4 days. You can also freeze them fully baked. Just wrap each one individually in plastic wrap, place in a freezer bag, and freeze for up to 2 months.
To reheat, I recommend the oven or an air fryer at 350 degrees F for 8 to 10 minutes. This brings back the crispy shell and warms the filling evenly without making them soggy. Avoid the microwave if you want to keep that crunch.
These chicken empanadas also work great as a party appetizer, a lunchbox addition, or a make-ahead freezer meal. If you love easy make-ahead chicken dinners, this Crockpot Chicken Fajitas recipe is another great one to keep in your rotation. Pro tip: double the filling and freeze half for a super fast dinner later in the week.
FAQs
Can I use store-bought rotisserie chicken for this recipe?
Yes, rotisserie chicken works great here. It is already cooked, well-seasoned, and shreds easily, making it the quickest path to a flavorful filling.
Can I fry these instead of baking them?
Absolutely. Heat about 2 inches of neutral oil in a deep pan to 350 degrees F and fry the empanadas for 2 to 3 minutes per side until golden. They will be slightly richer but just as delicious.
Can I freeze chicken empanadas before baking?
Yes. Assemble and seal them, then freeze in a single layer on a baking sheet before transferring to a freezer bag. Bake from frozen at 400 degrees F for 30 to 35 minutes, adding a few extra minutes until golden brown.

Shredded Chicken Empanadas
Ingredients
Equipment
Method
- Heat the oil in a large skillet over medium heat. Add the diced onion and bell peppers and cook, stirring occasionally, until softened and lightly golden, about 5 to 7 minutes. Add the minced garlic and stir for 30 to 60 seconds until fragrant.
- Stir in the tomato paste, cumin, oregano, salt, and pepper. Cook, stirring, for about 2 minutes until the tomato paste darkens and the spices smell toasty. Do not rush this step as it builds the deep flavor base of the filling.
- Add the shredded chicken and water. Stir to combine and simmer until most of the liquid evaporates and the chicken is juicy and well-coated, about 5 to 8 minutes. Remove from heat and let cool completely. Chill in the fridge for at least 30 minutes for best results.
- Preheat oven to 400 degrees F. Line a baking sheet with parchment paper. Place thawed dough rounds on a clean work surface and spoon about 2 tablespoons of filling onto the center of each round. Do not overfill.
- Moisten the edges of each dough round with water. Fold one half over the filling to form a half-moon shape. Press edges firmly together then crimp all the way around with a fork to fully seal. A good seal prevents leaks during baking.
- Brush the tops with the beaten egg. Bake for 25 to 30 minutes, until deep golden brown and crispy. Let cool a few minutes before serving as the filling holds a lot of heat inside.