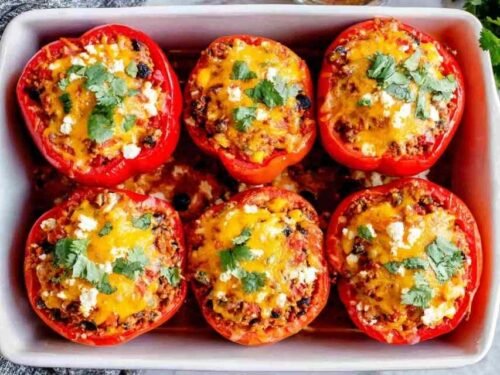
Vegetarian stuffed peppers are one of those dinners that look impressive on the table but come together with everyday pantry staples and very little fuss. Colorful bell peppers are loaded with seasoned rice, black beans, corn, and melted cheese, then baked until tender and bubbly. I make these regularly when I want something hearty and satisfying that everyone at the table will actually eat, meat eaters included.
The first time I made these, I was honestly caught off guard by how filling they turned out to be. The combination of beans, rice, and warm spices makes every bite feel complete and comforting without anything feeling heavy. The cheese on top gets just slightly golden in the oven and ties everything together in the best way. These vegetarian stuffed peppers are the kind of weeknight meal that earns a permanent spot in your regular rotation fast. Dig in and enjoy!
Table of Contents
Ingredients for Vegetarian Stuffed Peppers
I always reach for a good diced tomato for this filling because it adds so much more depth than a plain variety. Everything else here is simple and easy to find at any grocery store, which is exactly what makes this recipe so practical on a busy weeknight.
- 3/4 cup uncooked brown or white rice (or 2 cups cooked leftover rice) – I recommend using leftover rice when you have it to cut prep time down significantly
- 6 bell peppers (any color) – my preference is a mix of red, orange, and yellow for the sweetest flavor and the prettiest presentation on the table
- 1 tablespoon olive oil
- 3/4 cup yellow onion (finely chopped)
- 3 cloves garlic (minced)
- 1 can (15 oz) diced tomatoes
- 1 can (8 oz) tomato sauce (about 3/4 cup)
- 1 can (15 oz) black beans (rinsed and drained)
- 1 cup canned or frozen corn (drained if canned)
- 2 teaspoons chili powder
- 1 teaspoon ground cumin
- 1/2 teaspoon garlic powder
- 1/2 teaspoon dried oregano
- 1/2 teaspoon salt
- 1/8 teaspoon black pepper
- 1 cup shredded Mexican cheese blend, divided (about 4 oz) – in my experience, a Mexican blend melts better and adds more flavor dimension than plain cheddar alone
- Chopped fresh cilantro for garnish (optional)
Step-by-Step Instructions
I recommend cooking the rice first so it has time to cool slightly before it goes into the filling. Cooled rice holds its texture better once everything bakes together, and it keeps the skillet filling from steaming up when you stir it in.
Step 1: Cook the rice according to package directions and set aside to cool. If you are using leftover cooked rice, skip this step entirely.
Step 2: Preheat your oven to 400 degrees F. Cut the tops off each bell pepper and remove all the seeds and white membranes from the inside. Stand the peppers upright in a baking dish. If a pepper wobbles and won’t stand on its own, trim a very thin slice off the bottom to create a flat base, being careful not to cut through.
Step 3: Heat the olive oil in a large skillet over medium heat. Add the finely chopped onion and cook, stirring occasionally, for 2 to 3 minutes until softened and slightly translucent. Add the minced garlic and cook, stirring constantly, for 30 seconds until fragrant.
Step 4: Stir in the diced tomatoes, tomato sauce, black beans, corn, chili powder, cumin, garlic powder, dried oregano, salt, and black pepper. Reduce heat to low and simmer, stirring often, for 5 minutes. The filling will thicken slightly and smell deeply savory and spiced.
Step 5: Remove the skillet from the heat. Stir in the cooked rice and 1/2 cup of the shredded cheese until fully combined. Taste the filling here and adjust salt if needed before it goes into the peppers.
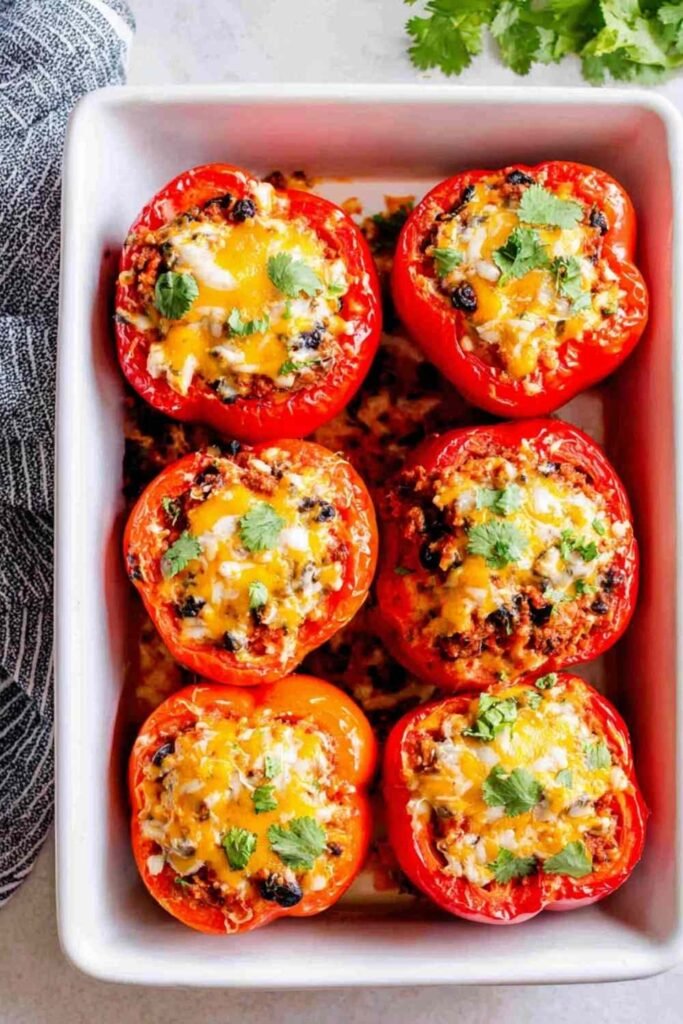
Step 6: Pour 3/4 cup of water into the bottom of the baking dish around the peppers. This steam helps the peppers cook through evenly without drying out. Spoon the filling generously into each pepper, packing it in gently. Sprinkle the remaining 1/2 cup of cheese evenly over the tops.
Step 7: Cover the baking dish tightly with aluminum foil that has been lightly sprayed with cooking spray on the inside to prevent the cheese from sticking to the foil. Bake for 30 minutes, then remove the foil and bake for 5 more minutes until the cheese on top is lightly golden and the filling is piping hot all the way through.
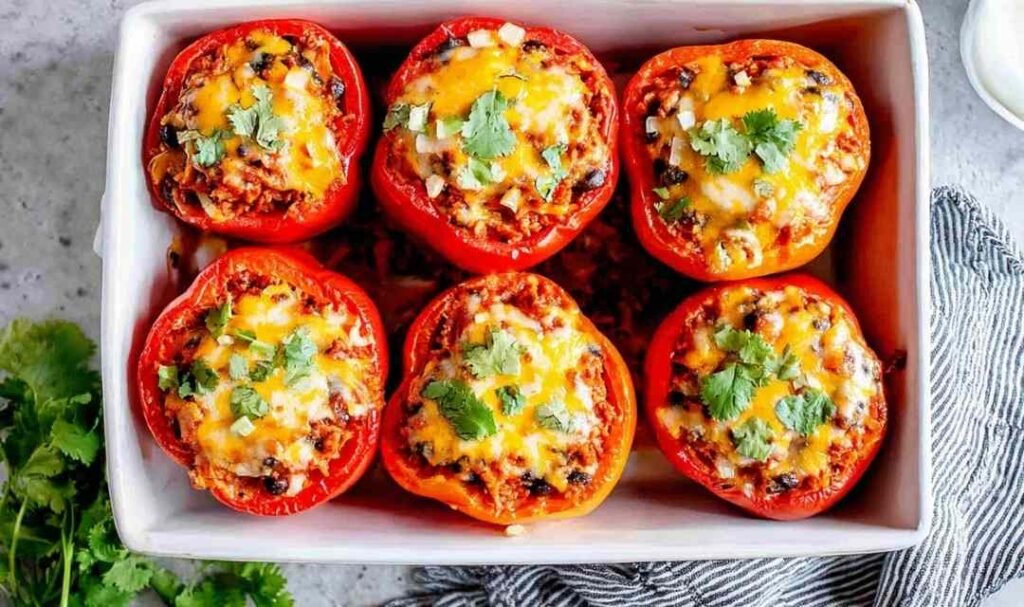
Step 8: Garnish with chopped fresh cilantro if desired and serve immediately straight from the baking dish.
What to Serve with Vegetarian Stuffed Peppers
These peppers are hearty enough to stand on their own, but a well-chosen side makes the meal feel complete. The best sides for vegetarian stuffed peppers offer a contrast in texture or something fresh and simple to balance the warm, spiced filling.
Simple Green Salad: A crisp salad tossed with a light vinaigrette is the easiest way to add freshness alongside the warm cheesy peppers. It rounds out the plate nutritionally without competing with the bold flavors in the filling.
Homemade Cheesy Breadsticks: Warm, pull-apart cheesy breadsticks are perfect for scooping up any filling that spills from the peppers. A crowd-pleasing side that works for kids and adults alike.
Did you enjoy this recipe?
Save it to your Pinterest board and make it again later!
📌 Save this Recipe@dinnerchickenrecipes
Easy Garlic Bread: Crispy garlic bread made with sliced bread is one of the quickest sides you can put together. The savory, buttery crunch pairs well with the Mexican-inspired spices in the filling.
Creamy Garlic Sauce Potatoes: Rich and comforting, these potatoes make a satisfying companion to the stuffed peppers. The mild creamy flavor balances the chili and cumin in the filling without overpowering it.
Broccoli and Mushroom Stir Fry: A quick vegetable stir fry adds extra color and nutrition to the plate and keeps the whole meal plant-based. The slight bite of the broccoli contrasts nicely with the soft, tender peppers.
Easy Vegetable Soup: For a full vegetarian dinner spread on a cold night, a bowl of light vegetable soup served alongside the stuffed peppers makes everything feel especially nourishing and complete.
Vegan Buddha Bowl: If you are serving guests with mixed dietary preferences, this vegan buddha bowl makes a beautiful companion dish that shares the same wholesome, plant-forward spirit as the stuffed peppers.
Spinach and Ricotta Stuffed Shells: Planning a meatless dinner night with more than one dish? These stuffed shells bring a creamy Italian contrast to the Mexican-spiced peppers and make for a genuinely impressive spread.
Storage and Serving Tips
Vegetarian stuffed peppers store really well and make excellent leftovers. Let them cool completely before transferring to an airtight container in the refrigerator. They keep well for up to 4 days and the flavors actually deepen a bit overnight.
To reheat, I recommend placing the peppers in a baking dish, covering loosely with foil, and warming in a 350 degree oven for 15 minutes until heated through. The microwave works for a faster option, just cover loosely and heat in 90-second intervals until hot all the way through. Pro tip: add a small splash of water to the dish before covering to keep the peppers from drying out during reheating.
The filling itself freezes beautifully for up to 3 months. Make a double batch of filling, store the extra in a freezer-safe container, and the next time you want these peppers you just thaw the filling overnight in the refrigerator, stuff fresh peppers, and bake as directed. It turns one cooking session into two dinners with almost no extra effort.
FAQs
Can I make vegetarian stuffed peppers ahead of time?
Yes. Assemble the filled peppers up to 24 hours in advance, cover tightly with foil, and refrigerate unbaked. When ready to cook, add about 5 extra minutes to the covered bake time since the filling will be cold going into the oven.
Can I use a different type of bean?
Absolutely. Pinto beans, kidney beans, or chickpeas all work well as substitutes for black beans. The texture and flavor will shift slightly but the filling holds together just as well with any of those options.
Do I need to pre-cook the bell peppers before stuffing them?
No. The water poured into the baking dish creates steam during the covered bake, which cooks the peppers through from the outside in. By the time the foil comes off and the cheese browns, the peppers will be tender all the way through.
Conclusion
These vegetarian stuffed peppers are a dinner you will feel good about putting on the table. They are colorful, satisfying, and built entirely from simple ingredients most people already have on hand. Try this recipe tonight and enjoy a hearty meatless meal that genuinely delivers on flavor. Your family is going to love every bite.

Vegetarian Stuffed Peppers
Ingredients
Equipment
Method
- Cook the rice according to package directions and set aside to cool. If using leftover cooked rice, skip this step.
- Preheat the oven to 400 degrees F. Cut the tops off each bell pepper and remove all seeds and white membranes. Stand the peppers upright in a baking dish. If a pepper wobbles, trim a very thin slice off the bottom to create a flat base without cutting through.
- Heat the olive oil in a large skillet over medium heat. Add the finely chopped onion and cook, stirring occasionally, for 2 to 3 minutes until softened and slightly translucent. Add the minced garlic and cook, stirring constantly, for 30 seconds until fragrant.
- Stir in the diced tomatoes, tomato sauce, black beans, corn, chili powder, cumin, garlic powder, dried oregano, salt, and black pepper. Reduce heat to low and simmer, stirring often, for 5 minutes until the filling thickens slightly.
- Remove the skillet from the heat. Stir in the cooked rice and 1/2 cup of the shredded cheese until fully combined. Taste and adjust salt if needed.
- Pour 3/4 cup of water into the bottom of the baking dish around the peppers. Spoon the filling generously into each pepper, packing it in gently. Sprinkle the remaining 1/2 cup of cheese evenly over the tops.
- Cover the baking dish tightly with aluminum foil lightly sprayed with cooking spray on the inside to prevent sticking. Bake for 30 minutes, then remove the foil and bake for 5 more minutes until the cheese is lightly golden and the filling is piping hot.
- Garnish with chopped fresh cilantro if desired and serve immediately.


")