Welcome to GainMeals, your destination for practical chicken recipes that work on busy weeknights. Founded by Grace Sullivan, a Portland-based recipe developer, every dish is tested in a real home kitchen and designed to deliver consistent, flavorful results without complicated techniques or specialty ingredients.
At GainMeals, we solve the weeknight dinner challenge with reliable chicken recipes that deliver consistent results. From crispy baked chicken to one-pan meals, each recipe uses straightforward methods that work even on your busiest nights.
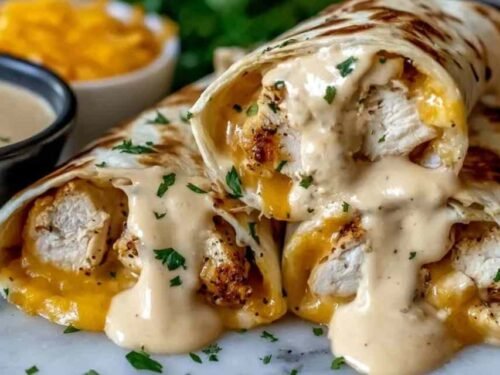
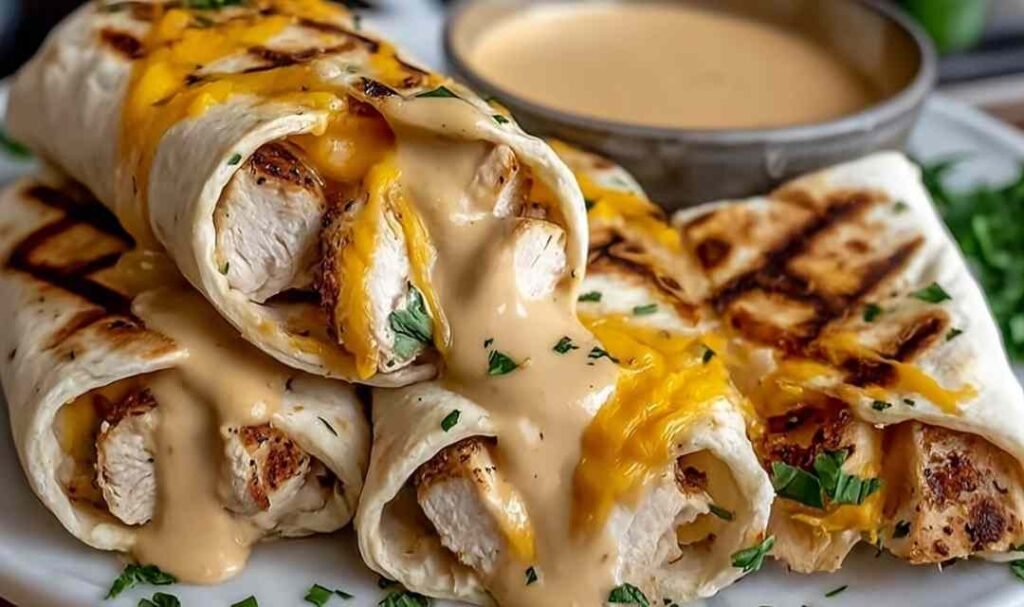
Cheesy Garlic Chicken Wraps are the kind of dinner that earns a loud “can we make this again?” before anyone even finishes their plate. Juicy chicken strips, sauteed veggies, and a creamy melty cheese blend all wrapped in a golden crispy tortilla — big flavor, no complicated techniques. I tested this recipe four times before I got the cheese blend exactly right, and the effort was absolutely worth it.
The idea came from one of those chaotic Wednesday nights where dinner had to happen fast. The fridge had a pound of chicken breast, half a bag of spinach, and a pretty desperate amount of shredded cheese. What came out of that skillet became one of the most-requested dinners at our table. These Cheesy Garlic Chicken Wraps hit every note — savory, garlicky, a little smoky, and wonderfully melty inside a crispy toasted tortilla. Your family will thank you!
Ingredients for Cheesy Garlic Chicken Wraps
Every time I make these wraps, I keep the ingredient list simple and easy to find at any grocery store. In my experience, using freshly minced garlic and freshly grated cheddar makes a noticeable difference in both flavor and how smoothly everything melts together. Here is everything you need:
For the Chicken
- 2 tablespoons extra virgin olive oil
- 1 1/2 lb chicken breast, sliced into thin strips — I recommend slicing them thin so they cook fast and stay juicy, not dry
- 5 cloves garlic, freshly minced
- 1 teaspoon Italian seasoning
- 1/2 teaspoon smoked paprika — my preference is smoked over regular paprika for that subtle, savory depth
- 1/4 teaspoon red chili flakes, adjust to taste
- Salt and black pepper, to taste
- 1 sweet onion, thinly sliced
- 1 red bell pepper, julienned
- 2 cups fresh spinach leaves
For the Cheese Blend
- 1 1/2 cups shredded mozzarella cheese
- 1/2 cup sharp cheddar cheese, freshly grated — in my experience, pre-shredded cheddar does not melt as smoothly because of the anti-caking coating
- 3 tablespoons cream cheese, softened to room temperature
- 2 tablespoons sour cream
- 2 teaspoons fresh chives, finely chopped
For the Wrap Assembly
- 6 large flour tortillas
- 1 1/2 tablespoons unsalted butter, melted
- 3/4 teaspoon garlic powder — I usually whisk this into the butter right before brushing so the flavor stays bright
Step-by-Step Instructions
I recommend reading through all the steps before you start cooking — it makes the whole process feel smooth and fast. In my experience, having the cheese blend mixed and ready before the chicken hits the pan keeps everything moving without any scrambling.
Step 1: Heat olive oil in a large skillet over medium-high heat until shimmering. Season chicken strips with salt and pepper, then add them to the pan in a single layer. Cook undisturbed for 3 minutes until golden on the bottom, then flip and cook another 2 to 3 minutes until cooked through. Transfer to a plate and tent loosely with foil to keep warm.
Step 2: In the same skillet, add the sliced onion and cook for 2 minutes until softened. Add the minced garlic and stir constantly for about 30 seconds until fragrant. Do not let it brown — burnt garlic will turn the whole filling bitter and there is no saving it at that point.
Step 3: Add the Italian seasoning, smoked paprika, and chili flakes, stirring to coat the onions and toast the spices lightly, about 20 to 30 seconds.
Step 4: Add the julienned bell pepper and cook for 3 minutes, stirring occasionally, until softened but still holding a little crunch for texture contrast.
Step 5: Return the chicken to the pan and toss everything together for about 1 minute. Fold in the fresh spinach and stir just until wilted, about 45 seconds. Remove from heat and let the mixture cool for 5 minutes. Do not skip the cooling step — hot filling will make your tortillas soggy before they even hit the skillet.
Step 6: In a medium bowl, combine the mozzarella and cheddar. Take about two-thirds of the cheese mixture and blend it with the cream cheese, sour cream, and chives until smooth. Reserve the remaining dry shredded cheese for the filling assembly.
Did you enjoy this recipe?
Save it to your Pinterest board and make it again later!
📌 Save this Recipe@dinnerchickenrecipes
Step 7: Whisk together the melted butter and garlic powder in a small bowl. Lay the tortillas flat on your work surface and brush one side of each with the garlic butter. Flip so the buttered side faces down — this is what gives you that golden crispy exterior.
Step 8: Spread about 2 tablespoons of the creamy cheese blend in the center of each tortilla, leaving a 2-inch border all around. Add an even portion of the chicken and vegetable mixture on top, then sprinkle with about 1 tablespoon of the reserved dry shredded cheese.
Step 9: Fold the bottom edge up over the filling, fold in both sides, then roll up firmly. Place seam-side down. Repeat with the remaining tortillas. If a wrap feels overstuffed and is hard to roll, remove a little filling — overfilled wraps tend to burst open in the skillet.
Step 10: Heat a clean dry skillet over medium heat. Place wraps seam-side down and cook for 2 to 3 minutes until golden and crispy. Flip and cook another 2 minutes on the other side. For extra melty cheese inside, cover the skillet with a lid during the last minute of cooking.
Step 11: Slice diagonally and serve immediately while the cheese is still gooey and the tortilla is at peak crispiness.
What to Serve with Cheesy Garlic Chicken Wraps
These wraps are rich and filling on their own, but the right side adds freshness, color, and balance to the whole meal.
Simple Green Salad: A crisp salad with a light lemon vinaigrette cuts right through the richness of the cheese and gives your plate a refreshing lift. If you enjoy easy chicken and veggie combinations, my Easy Chicken Breast and Green Beans is a great weeknight pairing idea.
Fresh Tomato Salsa or Pico de Gallo: A bright, chunky salsa adds acidity and freshness that pairs really well with the smoky garlicky filling. Spoon it right on top or serve it on the side for dipping.
Roasted Sweet Potato Wedges: The natural sweetness of oven-roasted sweet potato wedges balances the savory cheesy wrap beautifully, and the textures play well together.
Corn on the Cob: A classic, crowd-pleasing side that keeps the meal casual and easy, especially popular with kids. If you love that combination of chicken and corn flavors, my Street Corn Chicken Rice Bowl brings both together in one satisfying dish.
Garlic Roasted Vegetables: A sheet pan of roasted veggies is a no-fuss side that rounds out the meal with color and nutrition. Check out my Garlic Roasted Vegetables for a simple recipe that works perfectly here.
Another Wrap Night Option: If your family loves wraps, my Chicken Avocado Wrap and Crispy Air Fryer Chicken Mozzarella Wraps are two reader favorites worth bookmarking for your next rotation.

Storage and Serving Tips
Leftover wraps can be stored in an airtight container in the refrigerator for up to 3 days. I recommend wrapping each one individually in foil to help them keep their shape and stay fresh.
To reheat, skip the microwave if you can. Pro tip: place the wrap back in a dry skillet over medium-low heat for 3 to 4 minutes per side. This keeps the tortilla crispy and melts the cheese inside again instead of turning everything soft and rubbery. The microwave works in a pinch but you will lose that toasted exterior.
These Cheesy Garlic Chicken Wraps also work well as a make-ahead lunch. Prep the chicken filling up to 2 days ahead and store it separately in the fridge. Assemble and toast fresh wraps whenever you are ready to eat for the best texture every time.
FAQs
Can I use rotisserie chicken instead of cooking from scratch?
Absolutely. Shredded rotisserie chicken is a great shortcut here and cuts the overall time down significantly. Just warm it in the skillet with the garlic, onions, and spices for a few minutes so it soaks up all that flavor before you assemble.
Can I make these wraps ahead of time for meal prep?
Yes, but I recommend storing the filling and the tortillas separately. Fully assembled wraps tend to get soggy overnight in the fridge. When you are ready to eat, assemble and toast them fresh in a skillet for the best result.
What can I use instead of flour tortillas?
Whole wheat tortillas or spinach wraps both hold up well to the filling and work great. For a lower-carb option, large romaine or butter lettuce leaves make a lighter wrap, though they will not get the crispy toasted exterior. If you love the low-carb angle, check out my Low Carb Cheesy Garlic Chicken Wraps for a dedicated version.
Conclusion
These Cheesy Garlic Chicken Wraps come together in about 33 minutes and deliver the kind of satisfying, flavor-packed dinner that makes a regular weeknight feel a little special. The creamy cheese blend, smoky garlic chicken, and crispy golden tortilla make this a recipe your family will keep asking for. Give this one a try and make it your new go-to wrap night dinner!

Cheesy Garlic Chicken Wraps
Ingredients
Equipment
Method
- Heat olive oil in a large skillet over medium-high heat until shimmering. Season chicken strips with salt and pepper, then add to the pan in a single layer. Cook undisturbed for 3 minutes, then flip and cook another 2 to 3 minutes until cooked through and golden. Transfer to a plate and tent loosely with foil.
- In the same skillet, add the sliced onion and cook for 2 minutes until softened. Add the minced garlic and cook for 30 seconds until fragrant, stirring constantly. Do not let it brown.
- Add the Italian seasoning, smoked paprika, and chili flakes, stirring to coat the onions and toast the spices lightly, about 20 to 30 seconds.
- Add the julienned bell pepper and cook for 3 minutes, stirring occasionally, until softened but still slightly crisp.
- Return the chicken to the pan and toss everything together for about 1 minute. Fold in the fresh spinach and stir just until wilted, about 45 seconds. Remove from heat and let the mixture cool for 5 minutes before assembling.
- In a medium bowl, combine the mozzarella and cheddar. Take about two-thirds of the cheese mixture and blend it with the cream cheese, sour cream, and chives until smooth. Reserve the remaining dry shredded cheese for filling assembly.
- Whisk together the melted butter and garlic powder in a small bowl. Lay the tortillas flat and brush one side of each with the garlic butter mixture. Flip so the buttered side faces down.
- Spread about 2 tablespoons of the creamy cheese blend in the center of each tortilla, leaving a 2-inch border. Add an even portion of the chicken and vegetable mixture on top, then sprinkle with about 1 tablespoon of the reserved dry shredded cheese.
- Fold the bottom edge up over the filling, fold in both sides, then roll up firmly. Place seam-side down. Repeat with remaining tortillas.
- Heat a clean dry skillet over medium heat. Place wraps seam-side down and cook for 2 to 3 minutes until golden and crispy. Flip and cook another 2 minutes. For extra melty cheese, cover with a lid during the last minute of cooking.
- Slice diagonally and serve immediately.